虚拟请求流程
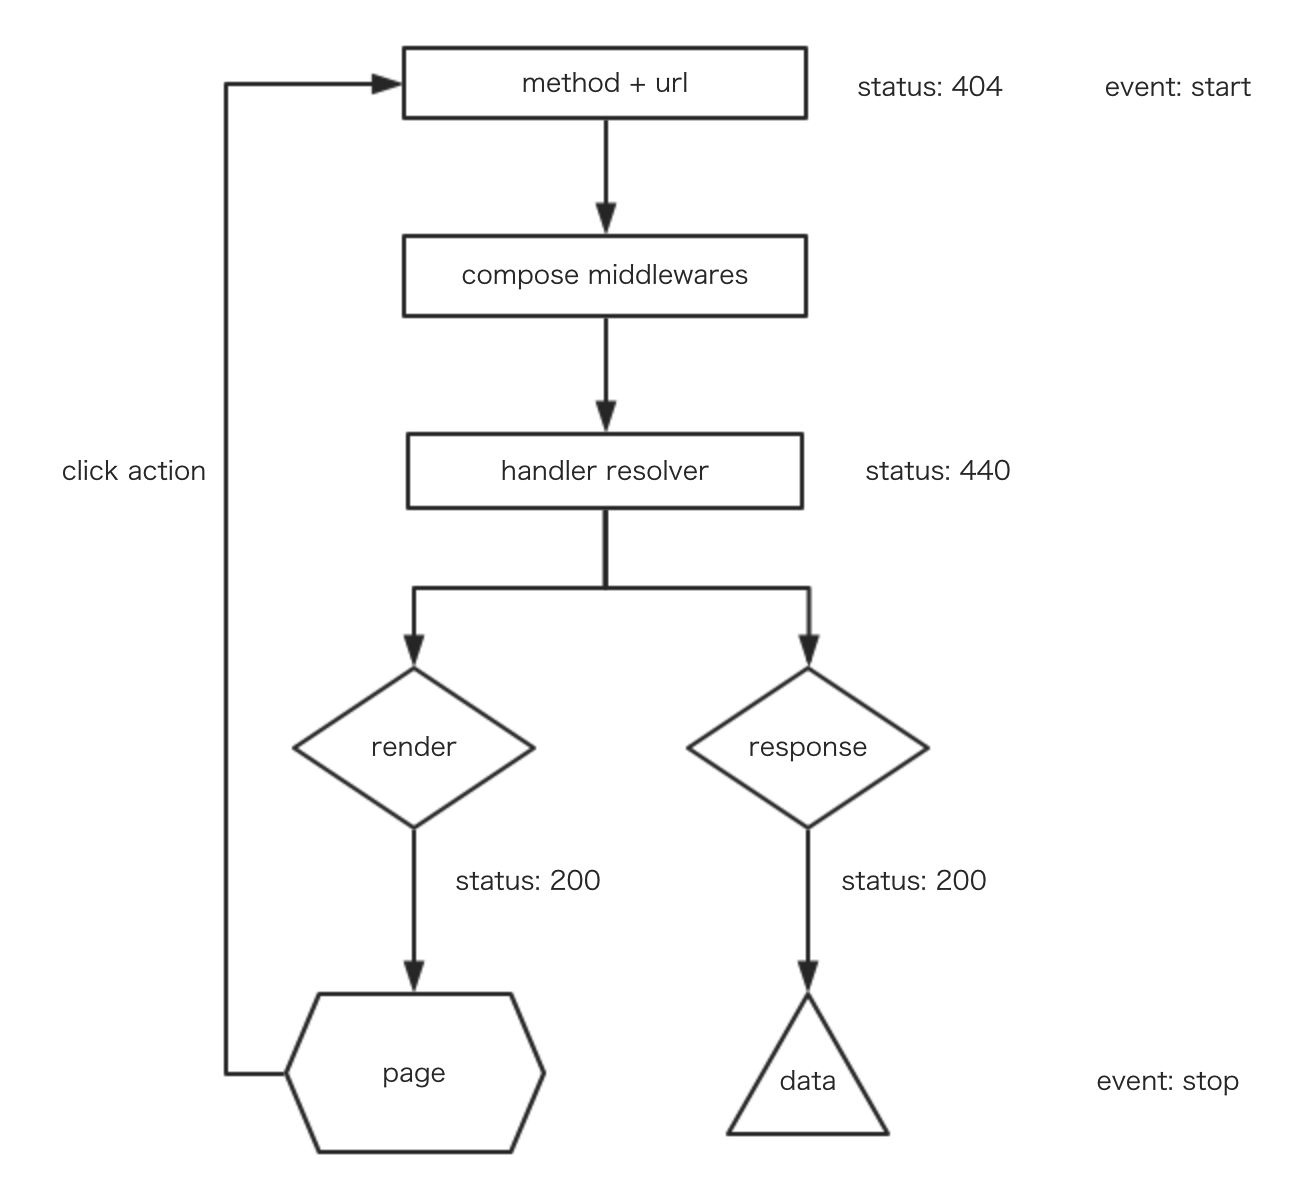
虚拟请求主要模拟后端的请求在前端的表现。它既可以渲染页面,也可以获取到数据。它的运作流程如下:
虚拟请求目前分为4种:
- @Http.Get(url) 对应
this.ctx.get(url)。请求数据来自this.ctx.query - @Http.Post(url) 对应
this.ctx.post(url, data)。请求数据分别来自this.ctx.query与this.ctx.req.body - @Http.Put(url) 对应
this.ctx.put(url, data)。请求数据分别来自this.ctx.query与this.ctx.req.body - @Http.Delete(url) 对应
this.ctx.delete(url)。请求数据来自this.ctx.query
虚拟请求的优势在接口的数据获取,都可以自我实现,具体接口从哪里获取,可以由虚拟请求路由的执行函数决定,解偶了传统的请求模式。
定义虚拟请求
在controller中定义虚拟请求
import { Http, Controller } from '@wox/wox';
@Controller('/api/test')
export default class Home {
  @Http.Get('/value')
  async Data() {
    const body = this.ctx.req.body;
    body.access = true;
    this.ctx.body = body;
  }
}
1
2
3
4
5
6
7
8
9
10
2
3
4
5
6
7
8
9
10
Controller中发送虚拟请求
controller中也可以通过虚拟请求取得数据。
@Http.Get('/test')
async TestPage() {
  const data = await this.ctx.get('/api/test/value');
  await this.ctx.render(webview, {
    text: data
  })
}
1
2
3
4
5
6
7
2
3
4
5
6
7
只要能够取到ctx或者app的地方都可以使用虚拟请求。
Vue文件中发送虚拟请求
<template>
  <div></div>
</template>
<script>
export default {
  mounted() {
    this.$get('/api/test/value').then(console.log)
  }
}
</script>
1
2
3
4
5
6
7
8
9
10
2
3
4
5
6
7
8
9
10
虚拟请求中的错误处理
wox中有个全局的错误处理事件,它能够捕获到,进行自定义处理。
app.on('error', e => console.error(e));
1
在虚拟请求中,我们还可以通过这样的模式来拦截错误
ctx.on('error', e => console.error(e));
1
如果我们需要吞噬掉错误,那么我们需要这样写:
ctx.on('error', e => {
  e.preventDefault();
  console.warn(e);
});
1
2
3
4
2
3
4
注意:
e.preventDefault();只在虚拟请求对象上有效